


 00:21
00:21
 androiarena

This tutorial contains step by step procedure to Setup Android SDK on a windows machine.


Select Developer Tools and click next, if you get some error in the next step like org.eclipse.wst.sse.core 0.0.0
Do the following else skip to next step
1. Go to Help->Install New Software
2. Click on "Available Software Sites"
3. Set "check" on check box - http://download.eclipse.org/releases/indigo (for helios - Eclipse 3.7)
Then again try installing the ADT
Just accept the license terms and Finish the installation of ADT it may show up few warnings regarding the plugin verification, accept it and restart Eclipse after installation
After the restart you would see a popup like this
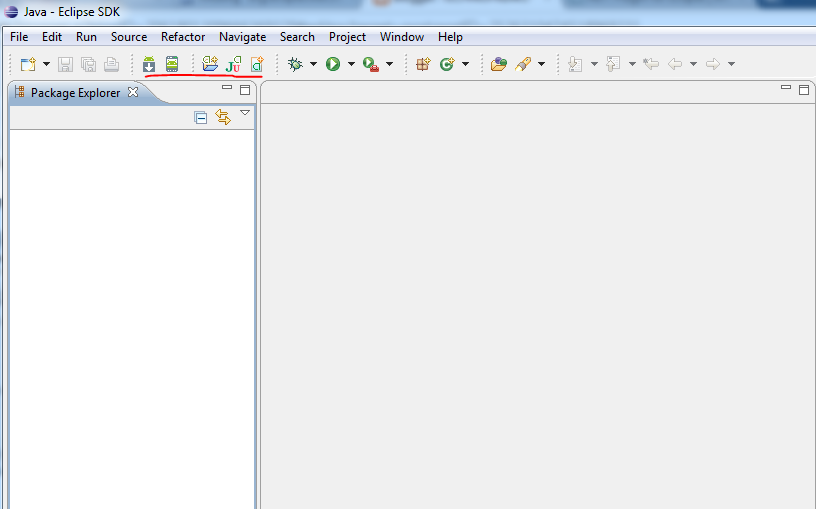
Select the path where android SDK was installed or you can also install a new SDK if you haven't done that before, finish the installation and you should see the highlighted items in the toolbar of eclipse

That means you have successfully setup Android SDK in Eclipse
Now Click on Android SDK manager and select the Android platforms you want to choose for your development and install them as shown below
That is it !!!
Go ahead developing your android applications!
Please read the prerequisites and installation requirements of each software before proceeding.
You can install any among the two types available .zip or .exe as the site says - yes it is preferable to download the .exe as which is easy .
After you install Android SDK download the latest Eclipse http://www.eclipse.org/downloads/
Any among the following two are good for android basic development
Unzip the eclipse ( i consider that you can setup the eclipse ..java path ...etc.,)
Start Eclipse and Install the Android Development Tools (ADT) by
Help >> Install new software.
and add the link https://dl-ssl.google.com/android/eclipse/ and name it ADT
Help >> Install new software.
and add the link https://dl-ssl.google.com/android/eclipse/ and name it ADT
Select Developer Tools and click next, if you get some error in the next step like org.eclipse.wst.sse.core 0.0.0
Do the following else skip to next step
1. Go to Help->Install New Software
2. Click on "Available Software Sites"
3. Set "check" on check box - http://download.eclipse.org/releases/indigo (for helios - Eclipse 3.7)
Then again try installing the ADT
Just accept the license terms and Finish the installation of ADT it may show up few warnings regarding the plugin verification, accept it and restart Eclipse after installation
After the restart you would see a popup like this
Select the path where android SDK was installed or you can also install a new SDK if you haven't done that before, finish the installation and you should see the highlighted items in the toolbar of eclipse
That means you have successfully setup Android SDK in Eclipse
Now Click on Android SDK manager and select the Android platforms you want to choose for your development and install them as shown below
That is it !!!
Go ahead developing your android applications!
 Posted in: tutorial1
0 comments:
Post a Comment